Table of contents
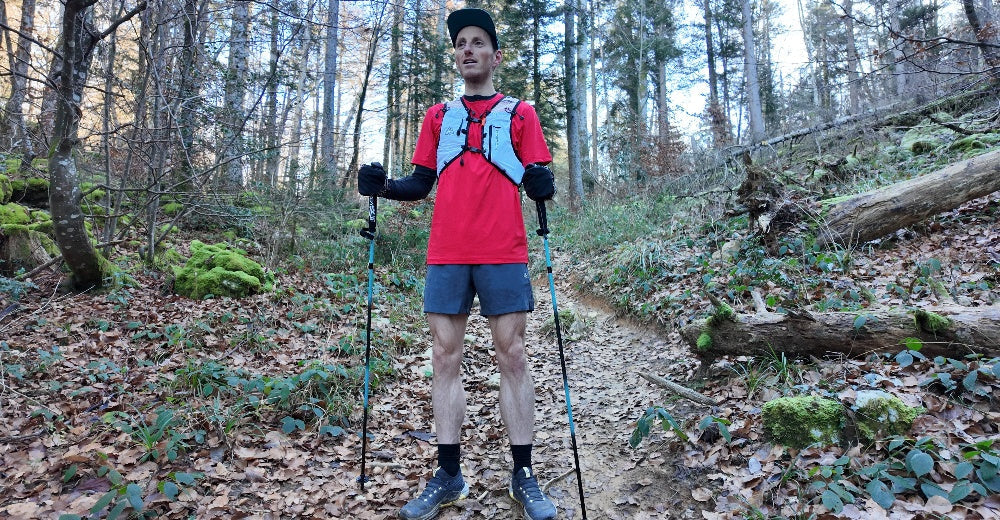
En las comunidades de Reddit r/trailrunning y r/ultrarunning, los novatos siempre hacen preguntas: algunos luchan con qué zapatos usar para su primera caminata en montaña, otros se preguntan qué hacer si tienen hambre a mitad de la carrera, y algunos miran desconcertados la deslumbrante variedad de vest packs mientras se preparan para su primera carrera de 20 km. Estas preguntas son comunes para casi todos los corredores de trail.
El atractivo del trail running radica en su libertad y desafío, pero precisamente porque las condiciones cambian constantemente y las reglas no son tan claras como las del running en carretera, los principiantes a menudo enfrentan más desafíos. Este artículo recopila las cinco preguntas más frecuentes de los novatos en la comunidad de Reddit y, combinado con el conocimiento experto en trail running, ofrece respuestas prácticas para ayudarle a evitar desvíos y disfrutar más rápido del viento y las montañas en el sendero.
P1: ¿Cómo debo elegir un hydration vest pack?
Al elegir un hydration vest pack, primero determine la capacidad según la distancia de su carrera/entrenamiento y la densidad de sus puntos de reabastecimiento. Luego considere el ajuste, la estabilidad, la accesibilidad y la disposición de los bolsillos. Un vest pack adecuado asegura un reabastecimiento más fluido, minimiza la fricción y hace que correr sea más cómodo—especialmente en carreras de larga distancia, donde puede ser su 'estación móvil de reabastecimiento combinada con un botiquín de primeros auxilios.'
Primero, determine el propósito → capacidad—el paso más crucial.
Entrenamiento de corta distancia/trote urbano/10–20 km: 3–5 L (para botellas blandas/pequeños suministros, teléfono y llaves).
Distancia media a larga (media maratón/20–50 km): 5–8 L (puede acomodar una vejiga de hidratación de 1.0–1.5 L o varias botellas blandas, una chaqueta y suministros energéticos).
Carreras ultra largas/de campo a través (50 km+/carreras de varias horas): 8–12+ L (necesita espacio para ropa de repuesto, una linterna frontal, comida adicional y ropa impermeable). Nota: Si la carrera tiene muchas estaciones de avituallamiento, elija una mochila más ligera y pequeña; si las estaciones son escasas o el clima es impredecible, opte por una mayor capacidad.
Consideraciones clave—Cada dimensión afecta la experiencia de correr
A. Ajuste y estabilidad (Lo más importante para la comodidad)
Por qué es importante: El movimiento desperdicia energía y puede causar fricción, ampollas y rozaduras.
Qué buscar:
- Correa de esternón ajustable y altura: Esto permite posicionar la mochila adecuadamente contra el pecho, minimizando el balanceo.
- Las correas dobles en el esternón o múltiples puntos de sujeción proporcionan mayor estabilidad que una sola correa en el esternón.
- ¿Las correas de los hombros están acolchadas y son elásticas, y se ajustan bien? ¿La espalda tiene malla elástica para transpirabilidad?
- ¿Ofrece la mochila un diseño 'ajustado' (sin espacios significativos)?
Método de prueba: Carga la mochila con agua y suministros y trota alrededor de la tienda durante 5–10 minutos para determinar si hay movimiento hacia arriba y abajo o de lado a lado, o si roza contra la clavícula o las axilas.
B. Sistema de hidratación: Vejiga vs. frasco blando
Ventajas de la vejiga: Alta capacidad (1–2L), bajo centro de gravedad e hidratación continua.
Desventajas: Requiere limpieza cuidadosa, se congela fácilmente en condiciones frías y puede ser complicado verter en estaciones de agua.
Ventajas del frasco blando: Acceso conveniente, limpieza más fácil y acceso rápido desde el bolsillo del pecho; más comúnmente usado para distancias cortas/medias.
Desventajas: Capacidad limitada (usualmente 250–500ml por botella), y llevar varias ocupa espacio en el pecho.
Recomendación: Un enfoque mixto ofrece la mayor flexibilidad—coloca una vejiga de 1–1.5L (o 2L dependiendo de la distancia) en el compartimento trasero y uno o dos frascos blandos (250–500ml) en el compartimento frontal para hidratación rápida durante la carrera.
C. Bolsillos y disposición del almacenamiento (La eficiencia determina el ritmo de la carrera)
Bolsillo en el pecho: Esencial—debe poder contener geles energéticos, pastillas de sal, un frasco blando y un teléfono pequeño, todo al alcance fácil con una mano. Compartimento principal: Para artículos más grandes como cortavientos, linterna frontal y manta de emergencia.
Bolsillo trasero/compartimento para vejiga de hidratación: Debe tener un divisor dedicado, correas de seguridad o clips para evitar que la vejiga se desplace.
Bolsillos en cintura/caderas: Prioriza comida de repuesto, una cámara pequeña y cambio.
Bolsillos con cremallera/secretos: Para llaves, identificación y dinero en efectivo.
Número recomendado de bolsillos: 6+ para mochilas cortas (incluyendo múltiples bolsillos frontales); 8–12 para mochilas de longitud media; y más compartimentos y compartimentos más grandes para mochilas extra largas.
D. Transpirabilidad, materiales y peso
Tela: Nylon ripstop ligero con recubrimiento DWR (repelente duradero al agua) es común; enfatizar áreas reforzadas para resistencia al desgaste (dobladillos y costuras de las correas de los hombros).
Malla trasera: Facilita la disipación del calor y reduce la humedad y fricción en la espalda durante carreras largas.
Peso en seco: Los chalecos de carrera deben ser lo más ligeros posible (menos de ~300–500 g en seco es ideal). Las mochilas de entrenamiento pueden ser más pesadas para mayor durabilidad. E. Accesorios estables (bastón de trekking, reflectante, sujeción para linterna frontal)
Sistema de sujeción para bastones: Correas elásticas + lazos fijos para mayor comodidad; bolsillos verticales y horizontales de acceso rápido permiten sujetar y guardar bastones rápidamente.
Seguridad nocturna: Tiras reflectantes, correa para sujetar linterna frontal, bolsillo SOS (para silbato/manta térmica), etc.
Calidad de cremalleras/cierres: Las condiciones off-road pueden causar desgaste significativo en los accesorios, por lo que son esenciales cremalleras YKK resistentes y cordones reforzados.
F. Tallas y Ajustabilidad
Cómo medir: Consulta la tabla de tallas de la marca para la circunferencia del pecho (en el punto más ancho del pecho) y la longitud del torso (desde la vértebra cervical C7 hasta el borde superior de la pelvis). Las tallas varían ligeramente entre marcas, así que asegúrate de consultar la tabla del fabricante.
Recomendación: La mayoría de los chalecos están disponibles en tallas S/M/L según la circunferencia del pecho. Si estás entre tallas, elige una talla más grande si llevas mucha agua con frecuencia para reducir la constricción.
Configuraciones de ejemplo para diferentes casos de uso
Entrenamiento de 90–120 minutos / 10–20 km (Plan ligero)
- Capacidad: 3–5 L
- Configuración de ejemplo: 1 x frasco blando de 500 ml (montaje delantero) o 1 x vejiga de mochila de 500 ml; 4–6 geles energéticos; teléfono; llaves; cortavientos ligero.
- Objetivo: Ligero, sin colgantes, montado al frente para fácil acceso.
Carrera de 20–50 km (Plan general de carrera)
- Capacidad: 5–8 L (por ejemplo, el UltraLight de 8L de Haimont es ideal)
- Configuración de ejemplo: vejiga de 1.5 L (montaje trasero) + 2 x frascos blandos de 250–500 ml (montaje delantero); 8–12 geles energéticos/gomitas; chaqueta ligera para viento/lluvia; pequeño botiquín; linterna frontal (si es de noche); calcetines de repuesto.
- Puntos clave: Guarde suministros esenciales en el bolsillo delantero, ropa de repuesto en el compartimento principal y asegure la vejiga para evitar movimientos.
50 km+ / Ultramaratón de varias horas (Plan de carga pesada)
- Capacidad: 8–12+ L
- Ejemplo: vejiga de agua de 2 L + 2 x botellas de 500 ml en el frente; múltiples alimentos sólidos (barras energéticas, sándwiches); linterna frontal + baterías de repuesto; manta de emergencia; capa térmica/chaqueta impermeable; calcetines extra; equipo de comunicación.
- Puntos clave: Considera la comodidad al llevar, la distribución de carga del cinturón de cadera y la facilidad para cambiar el equipo (permitiendo carga/descarga rápida de objetos voluminosos en estaciones de reabastecimiento).
Características específicas (recomendado verificar cada una durante la compra/evaluación)
- Capacidad acorde al uso previsto (3–5 L / 5–8 L / 8–12 L)
- Frasco/bolsillo frontal en el pecho (acceso con una mano)
- Compartimento trasero para vejiga de hidratación + correa + salida para pajilla (con conexión para tubo)
- Correa de esternón ajustable + doble o sujeción cruzada
- Correas de hombro acolchadas con malla transpirable
- Sistema de sujeción para bastones de trekking (guardado rápido/acceso rápido)
- Múltiples bolsillos con cremallera (llaves/ID)
- Bolsillo en la correa de cadera (para fotografía frecuente/acceso rápido)
- Tiras reflectantes/puntos de sujeción para correr de noche/silbato de seguridad
- Peso en seco (preferible ligero para carreras)
- Vejiga lavable a máquina/fácil de limpiar (mantenimiento sencillo)
- Recubrimiento impermeable o cubierta de lluvia opcional
Prueba y consejos para probar (obligatorio antes de comprar)
- Prueba de carrera con peso: Carga tu mochila con agua y suministros que normalmente llevarías en días de carrera y trota en la tienda o al aire libre. Corre durante 10–20 minutos para sentir la vibración y fricción.
- Prueba de acceso con una mano: ¿Puedes sacar geles energéticos del bolsillo frontal con una mano (mientras corres)?
- Prueba de ajuste: ¿La correa del pecho/correa del hombro afecta la respiración después del ajuste? ¿Comprimen tu clavícula o las axilas?
- Acceso/Salida de una Vejiga de Agua: ¿Es fácil rehidratarse rápidamente en una estación de avituallamiento? ¿Es fácil cargar, quitar y asegurar la vejiga?
- Prueba de Carga Simulada: Si llevas bastones de trekking, prueba qué tan fácil es devolver los bastones a los puntos de sujeción.
Problemas Comunes y Soluciones
- ¿La parte trasera de la mochila se calienta o se siente pegajosa? → Elige un modelo con una gran malla trasera, reduce los puntos de contacto directo con la tela y mejora la transpirabilidad.
- ¿La mochila se balancea de un lado a otro mientras corres? → Ajusta la correa del pecho/ajusta las correas de los hombros para asegurar que tu centro de gravedad esté alineado con la línea central de tu espalda (cerca de tu columna).
- ¿Dificultad para acceder a los bolsillos? → Los bolsillos delanteros son demasiado profundos o estrechos. Recomendamos cambiar el modelo o añadir una pequeña bolsa elástica al bolsillo delantero.
- ¿La vejiga de agua huele a moho? → Usa un cepillo especial de limpieza y una hoja de limpieza para secar completamente los tubos y la vejiga después de la carrera.
Mantenimiento y Limpieza (Extender la Vida Útil)
- Vejiga de Hidratación: Después de la carrera, limpia con agua tibia y una hoja especial de limpieza o bicarbonato de sodio. Ábrela y déjala secar al aire o usa un soporte para permitir un secado completo. Evita dejar bebidas deportivas en la vejiga durante la noche.
- Mochila: Lavar a mano o a máquina según las instrucciones del fabricante (si está permitido), usando un detergente suave y evitando lejía fuerte. Lubrica e inspecciona las cremalleras regularmente.
- Almacenamiento: Guarda en un ambiente seco, permitiendo que la vejiga y el tubo ventilen y se sequen completamente para prevenir moho.
Ejemplo Práctico de Empaque (Basado en 20/50/100 km)
- 20 km: frasco blando delantero (250–500 ml), teléfono móvil, dos geles, llaves y una chaqueta ligera.
- 50 km: vejiga de hidratación trasera de 1.5 L + dos botellas de 250 ml en el compartimento delantero, ocho geles/dulces de gelatina, una linterna frontal, un impermeable ligero, un botiquín de primeros auxilios y calcetines de repuesto.
- 100 km: vejiga de agua trasera de 2L + 2 botellas de 500 ml en la parte delantera, mucha comida sólida, linterna frontal + repuestos, capas cálidas, más botiquín de primeros auxilios, batería externa de respaldo.

P2: ¿Cómo elijo los zapatos de trail running adecuados?
Elegir los zapatos de trail running adecuados es una tarea crítica para cada corredor, especialmente para principiantes. Diferentes terrenos, condiciones climáticas y la forma del pie influyen en tu elección. A continuación, explicaré cómo elegir los zapatos de trail running adecuados desde varias perspectivas:
Terreno y Aplicación
La característica clave de los zapatos de trail running es que se adaptan a diferentes terrenos. Por lo tanto, tu elección debe basarse en las condiciones en las que corres con frecuencia.
- Terreno húmedo o fangoso: Si corres frecuentemente en condiciones fangosas o resbaladizas (como después de la lluvia o en terreno montañoso blando), necesitas una suela con tacos profundos y un agarre fuerte. Este diseño de suela previene eficazmente los resbalones en condiciones húmedas. Marcas como Salomon Speedcross funcionan bien en estas condiciones.
- Superficie rocosa o dura: Si tu sendero implica muchas rocas duras o tierra, es crucial elegir un zapato con una suela duradera y resistente. Una suela con textura superficial poco profunda mejora la estabilidad y comodidad. Zapatos como el La Sportiva Bushido están diseñados específicamente para superficies rocosas y duras, proporcionando excelente tracción y protección.
- Terreno variable: Si tu sendero presenta una gran variedad de terrenos, a veces húmedos y a veces rocosos, considera un zapato de running híbrido. Este zapato ofrece tanto tracción como estabilidad para adaptarse a condiciones variables de la superficie. El Brooks Cascadia es un ejemplo de zapato versátil.
Suela y agarre
El diseño de la suela de un zapato de trail es crucial, especialmente su agarre. Los tipos comunes de suela incluyen:
- Suela de goma de alta elasticidad: Este material proporciona mayor resistencia al desgaste en superficies duras y terrenos irregulares.
- Suela Vibram: Muchos zapatos de trail de alta gama usan suelas Vibram, conocidas por su excelente agarre y resistencia al deslizamiento. Especialmente adecuadas para rocas resbaladizas y terrenos fangosos.
- Suelas con patrones de tracción profundos: Para terrenos fangosos y blandos, los zapatos de trail suelen diseñarse con patrones de tracción profundos (como la serie Salomon Speedcross) para proporcionar mejor agarre en superficies resbaladizas.
Forma del pie y diseño del zapato
La forma del pie de cada persona es diferente, y elegir zapatos para correr en senderos también debe tener esto en cuenta. Aquí hay algunas formas comunes de pies y recomendaciones de zapatos:
- Pies estrechos: Si tienes pies estrechos, elige zapatos con un ajuste más ceñido. Estos zapatos suelen ser más estrechos en la caja de los dedos y proporcionan un ajuste firme. Marcas como Inov-8 y Saucony son adecuadas para corredores con pies estrechos.
- Pies anchos: Si tienes pies anchos, es importante elegir un zapato más ancho. Marcas como Altra ofrecen cajas de dedos anchas, que permiten que tus dedos se abran naturalmente y evitan la presión.
- Corredores con arcos altos o bajos: Elige un zapato según la altura de tu arco. Si tienes arcos bajos (pies planos), elige zapatos con soporte extra (como los Brooks Cascadia o Salomon Sense Ride). Si tienes arcos altos, elige zapatos con buena amortiguación para reducir el impacto.
Comodidad y soporte
- Comodidad: Las carreras largas por senderos ejercen mucha presión sobre tus pies, por lo que la comodidad es la consideración principal al elegir zapatos. Al elegir zapatos, asegúrate de que el espacio dentro del zapato se ajuste a la forma de tu pie. Evita zapatos que estén demasiado apretados o demasiado sueltos, ya que pueden causar ampollas o entumecimiento en los dedos.
- Soporte y protección: En superficies irregulares de senderos, tus tobillos y plantas requieren más soporte y protección. Muchos zapatos de trail tienen empeines reforzados o protección en la suela (como insertos de goma) para ayudar a evitar que las piedras golpeen tus pies o esguinces de tobillo.
- Plantillas y amortiguación: Durante carreras largas, las plantillas y la amortiguación adecuadas pueden reducir eficazmente el impacto y prevenir lesiones en las articulaciones. Para carreras más largas (por ejemplo, 50 km o más), se recomienda elegir zapatos con excelente amortiguación, como la serie Hoka One One.
Peso y Transpirabilidad
- Ligereza: El peso de los zapatos de trail running impacta directamente en tu experiencia de carrera, especialmente durante carreras largas o sesiones de entrenamiento. Muchos corredores prefieren zapatos más ligeros para reducir la carga y aumentar la velocidad. Sin embargo, los zapatos ligeros pueden sacrificar soporte y protección. Elige el zapato de trail running ligero adecuado según tus necesidades personales, como el Altra Superior.
- Transpirabilidad e Impermeabilidad: Las condiciones del trail running pueden ser húmedas o lluviosas, por lo que la transpirabilidad y la impermeabilidad son cruciales. Los zapatos transpirables ayudan a eliminar el sudor y evitar el sobrecalentamiento, mientras que los diseños impermeables mantienen los pies secos bajo la lluvia y previenen ampollas. Las membranas impermeables Gore-Tex son comunes en zapatos de trail running, como el Salomon XA Pro 3D GTX. 6. Durabilidad del Zapato
- Durabilidad: Cuando los zapatos de trail running se usan en entornos duros como montañas y rocas, el desgaste en suelas y partes superiores es inevitable. Por lo tanto, es importante elegir zapatos altamente resistentes al desgaste. En general, los zapatos con suelas Vibram o goma reforzada son más duraderos y adecuados para uso prolongado e intenso.
Marca y Reputación
Elegir una marca con una fuerte reputación en trail running puede aumentar tu confianza al comprar. Marcas comunes como Salomon, La Sportiva, Altra, Brooks, Hoka One One e Inov-8 ofrecen diferentes tipos de zapatos para trail running que se adaptan a distintos terrenos, climas y necesidades de los corredores.
No existe un estándar fijo para elegir el zapato adecuado para trail running. Lo más importante es adaptarlo a tu entorno de carrera, forma del pie y necesidades. Ya sea tracción, comodidad o protección, cada factor debe considerarse de manera integral al comprar. Prueba correr en diferentes tipos de terreno para encontrar el zapato de trail running que mejor se adapte a tu pie.

P3: ¿Cómo deberías abastecerte durante el trail running, especialmente en carreras largas?
Hemos desglosado el 'abastecimiento' en módulos accionables: Principios Básicos → Hidratación → Energía (Carbohidratos) → Electrolitos → Comida Sólida y Textura → Estrategias de Transporte y Estaciones → Cómo Entrenar Tu Intestino Durante el Entrenamiento. Cada sección proporciona rangos numéricos específicos, ejemplos de conversión y consejos prácticos para aplicación inmediata en entrenamiento y competición.
Principios Básicos
Practica primero, luego corre: Todas las fórmulas de combustible, marcas y tiempos deben probarse repetidamente durante las largas sesiones de entrenamiento. Nunca reserves productos o combinaciones nuevas para el día de la carrera.
Reabastece según un horario, no según el 'sentimiento': Es fácil olvidar o procrastinar durante una carrera; reabastecerse a intervalos regulares (por ejemplo, cada 30–45 minutos) es más confiable.
Pequeñas ingestas frecuentes: Ya sea agua o energía, ingestas frecuentes de pequeñas cantidades facilitan una mejor absorción y reducen las molestias gastrointestinales en comparación con una ingesta única y grande.
Reabastece principalmente con carbohidratos, complementados con electrolitos y una pequeña cantidad de sólidos: Durante el ejercicio prolongado, se consumen principalmente carbohidratos (glucógeno), mientras que los electrolitos y alimentos sólidos se usan para mantener la masa muscular, la resistencia y el bienestar psicológico.
El ambiente y el volumen de sudor determinan la intensidad de la rehidratación: El clima caluroso, la humedad y las subidas prolongadas aumentan significativamente las necesidades de líquidos y sales.
Manejo de líquidos
Objetivo de referencia (temperatura normal/sudoración moderada): aproximadamente 400–600 ml/hora.
Ejemplo: 500 ml/hora es 500 × 1 = 500 ml/hora.
En clima caluroso o con sudoración intensa: Aumentar a 700–1000 ml/hora, pero los electrolitos deben tomarse al mismo tiempo; de lo contrario, puede ocurrir hiponatremia.
Frecuencia de sorbos: Se recomienda beber 100–150 ml cada 15–20 minutos (equivalente a 300–450 ml por hora). Ejemplo: Beber 125 ml cada 20 minutos → 60 ÷ 20 = 3 veces/hora; 125 × 3 = 375 ml/hora.
Métodos de monitoreo:
- Pésate antes y después de una carrera: La pérdida de peso ≈ pérdida de agua (1 kg ≈ 1 L). Por ejemplo: Si pesas 70 kg, una pérdida de 1.4 kg = 1.4 L; calcula: 70 × 0.02 = 1.4 (representando el 2% del peso corporal). Si es >2%, estás en alto riesgo de deshidratación.
- Color de la orina: Amarillo claro es ideal; amarillo oscuro indica necesidad de mayor ingesta de líquidos.
No solo bebas agua: Beber grandes cantidades de agua durante un largo período puede diluir la concentración de sodio en la sangre (hiponatremia), así que alterna con o consume bebidas deportivas ricas en electrolitos.
Consumo de energía (carbohidratos)—¿Cuál es la cantidad adecuada?
Directrices comunes:
- Ejercicios de menos de 2 horas: 30–60 g de carbohidratos/hora.
- Ultramaratones/Ultramats (más de 2 horas): 60–90 g de carbohidratos/hora (si has entrenado con el Método Multi-Transport Carbohydrate y tu tracto gastrointestinal está adaptado).
¿Por qué contar en gramos? 1 gramo de carbohidratos ≈ 4 kcal.
- Ejemplo de conversión: Si tu objetivo es 60 g de carbohidratos/hora, tus calorías por hora = 60 × 4 = 240 kcal. Escribe el cálculo: 60 × 4 = 240 (g × kcal/g = kcal).
Combinaciones comunes de combustible (ejemplos):
- Geles energéticos: Típicamente 20–30 g de carbohidratos por gel (≈ 80–120 kcal).
- Gomitas energéticas: 10–25 g de carbohidratos por paquete.
- Barras energéticas/pequeños sólidos: 20–40 g de carbohidratos por porción, y son más masticables.
Ritmo real (ejemplo):
1 gel cada 45–60 minutos (aproximadamente 25 g de carbohidratos). Cálculo: 25 g ÷ 1 h = 25 g/h. Si añades un paquete de gomitas de 20 g: 25 + 20 = 45 g/h; Calorías: 45 x 4 = 180 kcal/h.
Explicación de 'Multi-Transport Carbohydrate': Combinar glucosa (o maltodextrina) con fructosa puede aumentar la tasa total de absorción intestinal, elevando así el límite superior de ingesta de ~60 g/h a ~90 g/h (usar solo durante el entrenamiento tras practicar y adaptarse).
Electrolitos (especialmente sodio)—No te fíes solo de la 'sed'
Objetivo de Sodio (Na): 300–700 mg/h, dependiendo del volumen de sudor y la complexión (más alto para sudores intensos).
Ejemplo: Si tu objetivo es 500 mg/h, una carrera de 6 horas requeriría 500 x 6 = 3000 mg de sodio. Cálculo total: 500 x 6 = 3000 mg.
Referencia de Potasio (K): 50–200 mg por hora (usualmente obtenido de alimentos/bebidas deportivas).
Cuándo usar pastillas de sal/tabletas de electrolitos: Cuando hace calor, sudas mucho o tienes antecedentes de calambres, toma una tableta de electrolitos/bebida cada hora o cada 1–2 horas.
Nota: Beber solo más agua no repone el sodio; si sospechas de bajo sodio (dolor de cabeza, náuseas, confusión), deja de beber grandes cantidades de agua diluida y busca atención médica.
Rota los alimentos sólidos y sabores (evita 'comer hasta enfermar')
¿Por qué llevar alimentos sólidos? Las carreras largas requieren una alta ingesta de carbohidratos, y la fatiga del paladar es común. Los alimentos sólidos proporcionan una textura masticable, sal y energía sostenida.
Alimentos sólidos recomendados: Rodajas de plátano, pequeños bollos de arroz/pasteles de arroz, galletas saladas, pequeñas barras energéticas y triángulos de sándwich de mantequilla de maní (bajo en grasa).
Alimentos a evitar: Alimentos altos en fibra, grasas, fritos o picantes (intenta evitarlos antes y durante la carrera, ya que pueden causar molestias gastrointestinales). Estrategia de sabor: Alterna sabores dulces y salados (por ejemplo, come dos chicles dulces en dos horas, seguido de una galleta salada). Esto ayuda a retrasar la fatiga del gusto.
Estrategia de Transporte: Combinación Mochila de chaleco/Hidratación/Botella blanda/Estación de ayuda
Principio Básico: Cantidad de Agua que Necesitas Llevar = Distancia del Recorrido × Tasa de Sudor Esperada (Si las estaciones de ayuda son frecuentes, lleva menos; si no hay estaciones, lleva más).
Combinaciones Comunes:
- Distancia Corta/Alta Reposición: Botella de pecho (0.25–0.5 L) + Mochila pequeña (3–5 L).
- Distancia Media (20–50 km): Mochila de chaleco 5–8 L + 1 × 500–1000 ml de hidratación/botella blanda.
- Distancia Extra Larga (más de 50 km): Mochila de chaleco 8–12 L + 2 L de hidratación o múltiples botellas blandas (o rellenar en paradas). Consejos prácticos:
- Coloca tus suministros regulares (geles, tabletas de sal) en el bolsillo delantero para un acceso fácil durante la carrera.
- Coloca los pesos más cerca del centro de tu espalda para minimizar el movimiento; ajusta las correas del pecho y los hombros para un ajuste ceñido.
- Usa bolsas transparentes o etiquetas para almacenar tus suministros por hora (prueba esto durante el entrenamiento).
Cómo practicar el 'Entrenamiento intestinal' durante el entrenamiento
Propósito: Mejorar la tolerancia gastrointestinal a altos flujos de líquidos y carbohidratos para evitar vómitos/diarrea durante la competencia.
Método:
- Durante entrenamientos largos (≥2 horas), consume agua y carbohidratos según tu plan de carrera (por ejemplo, 50–60 g de carbohidratos + 500 ml de agua por hora) y observa tu respuesta.
- Prueba diferentes combinaciones para cada entrenamiento largo: solo geles, geles + bebida, sólidos + bebida, y anota cuál funciona mejor.
- Aumenta lentamente la ingesta de carbohidratos semanalmente (por ejemplo, de 40 g/h → 50 g/h → 60 g/h) para permitir que tus intestinos se adapten a la mayor ingesta.
Tiempo: Practica tu plan de alimentación (incluyendo desayuno previo a la carrera, tiempos durante la carrera y estrategias de cambio de alimentos) durante al menos 2–3 entrenamientos largos antes de la carrera.
Problemas comunes y soluciones (Preguntas frecuentes de la fábrica)
- ¿Qué hacer si tienes calambres? Primero, verifica si hay deficiencia de sodio, deshidratación o fatiga excesiva. A corto plazo, puedes suplementar con sodio (pastillas de sal/bebidas electrolíticas), hidratarte y estirar suavemente. La prevención a largo plazo depende del entrenamiento, entrenamiento de fuerza y manejo de electrolitos.
- ¿Te sientes nauseabundo/náuseas? Detente y toma sorbos de agua/bebidas electrolíticas para ralentizar la ingesta de sólidos. Reduce tu ritmo y prueba alimentos más ligeros (como pequeños bocados de galletas saladas). Durante tu próximo entrenamiento, reduce el ritmo y ajusta el tipo de alimentos que consumes.
- ¿Tienes sed pero te sientes hinchado fácilmente? Reduce tu ingesta y cambia a sorbos más frecuentes de agua. Evita bebidas con alto contenido de azúcar (que pueden ralentizar el vaciado gástrico).
Ejemplo del mundo real (ejemplo de carrera de 6 horas)
Establecimiento de objetivos: 60 g de carbohidratos/hora, 600 ml de líquidos/hora, 500 mg de sodio/hora (ejemplo, ajustar según necesidades individuales y condiciones climáticas).
Total por hora: 60 g de carbohidratos → 60 × 4 = 240 kcal (por hora). Escrito como: 60 × 4 = 240. Ingesta total en 6 horas:
- Carbohidratos: 60 × 6 = 360 g; Conversión de calorías: 360 × 4 = 1440 kcal. Cálculo: 360 × 4 = 1440.
- Líquido: 600 ml × 6 = 3600 ml = 3.6 L. Cálculo: 600 × 6 = 3600 ml.
- Sodio: 500 mg × 6 = 3000 mg. Cálculo: 500 × 6 = 3000 mg.
Ejemplo de ingesta por hora (puede dividirse en porciones de 30 minutos):
- Comenzando a las 0:00: 200–300 ml de bebida electrolítica + una pequeña barra energética (30 g de carbohidratos)
- Cada 30 minutos: 150–200 ml de agua/bebida + un gel energético de 25 g cada 45 minutos o una combinación (1 gel + una pequeña gomita) cada hora para lograr ~60 g/hora.
- Cada 60–90 minutos: 1 tableta de electrolitos que contenga sodio o bebida equivalente en sodio (si la bebida contiene sodio, ajusta en consecuencia).
Lista de empaque (larga distancia/un solo día)
- 1–2 L de vejiga de hidratación o 2 x 500 ml de botellas blandas (montaje frontal)
- 6–10 geles energéticos (según horas de carrera y consumo)
- 1–2 paquetes de gomitas
- 1–2 barras energéticas o pequeños snacks
- Sobres/tabletas de polvo de electrolitos (empaquetados por hora)
- Calcetines de repuesto, un botiquín básico, cinta adhesiva y un vendaje hemostático
- Teléfono móvil, identificación, efectivo y una linterna frontal (para carreras nocturnas)
- Chaqueta cortaviento/impermeable (según el clima)
- Bolsa de basura (para empaques vacíos, ecológica)
Consejos finales
- No cambies de marcas/sabores en el último momento; ensaya a fondo tu plan durante 2–3 carreras largas antes de la carrera.
- Ajusta según el entorno: aumenta líquidos y sodio en clima caluroso; reduce la ingesta de líquidos pero mantén la ingesta de carbohidratos en clima frío.
- Si tienes una condición médica crónica o tomas medicamentos especiales (como enfermedades cardíacas o hipertensión), consulta a tu médico antes de cambiar tu nutrición o comenzar un régimen de pastillas de sal/alto sodio.
Desde mochilas tipo chaleco hasta zapatillas de correr, pasando por la gestión de tu combustible en el sendero: estos tres temas clave son el punto de partida para casi todos los corredores de trail nuevos. Determinan si puedes mantener la comodidad, seguridad y niveles de energía durante largas carreras en montaña. Elegir el equipo adecuado es como preparar la llave correcta; dominar el sistema de alimentación adecuado es como inyectar un sistema de energía duradero en tu cuerpo.
Pero los desafíos del trail running no terminan ahí. Incluso con el equipo y combustible adecuados, sin un entrenamiento específico y una comprensión profunda del sendero, tu cuerpo seguirá luchando para soportar las largas subidas y los impactos. Por esta razón, en el próximo capítulo, profundizaremos en cómo los principiantes pueden establecer un sistema efectivo de entrenamiento para trail y enfrentar los desafíos impredecibles de los senderos reales y entornos extremos.

